LUUM.IO
Amatis - BACnet GUIDE#
About This Guide#
Welcome to the BACnet for the Amatis Lighting Control System. In this guide, you'll find explanations of the BACnet integration setup. Whether you're looking to turn on BACnet for the first time, or trouble shoot BACnet reporting, this guide will walk you through the process. Keep in mind that our team is here to support your BACnet project, in many situations we are happy set up BACnet for you.
Necessary Parts#
The following parts will be necessary to complete this guide:
- A fully commissioned project with an AMBR
- Network accesses to AMBR, and the ip addresses of those devices
- BACnet server ID's for each AMBR
- A description of the types of points you would like to expose over BACnet. Example:
- The levels of the lights
- The occupied state of the location
- Temperature
System Setup#
Before getting started with BACnet, ensure the system is fully commissioned and programmed. Once all the devices are in their locations and reporting data, BACnet configuration can begin.
Turn On BACnet, Start Reporting Data#
In this section we will turn on the BACnet server in each AMBR using the server's BACnet ID, and select any data point to start reporting.
Note
Don't worry about selecting the correct data point at this stage, in the next section we cover some tips to help filter this list.
-
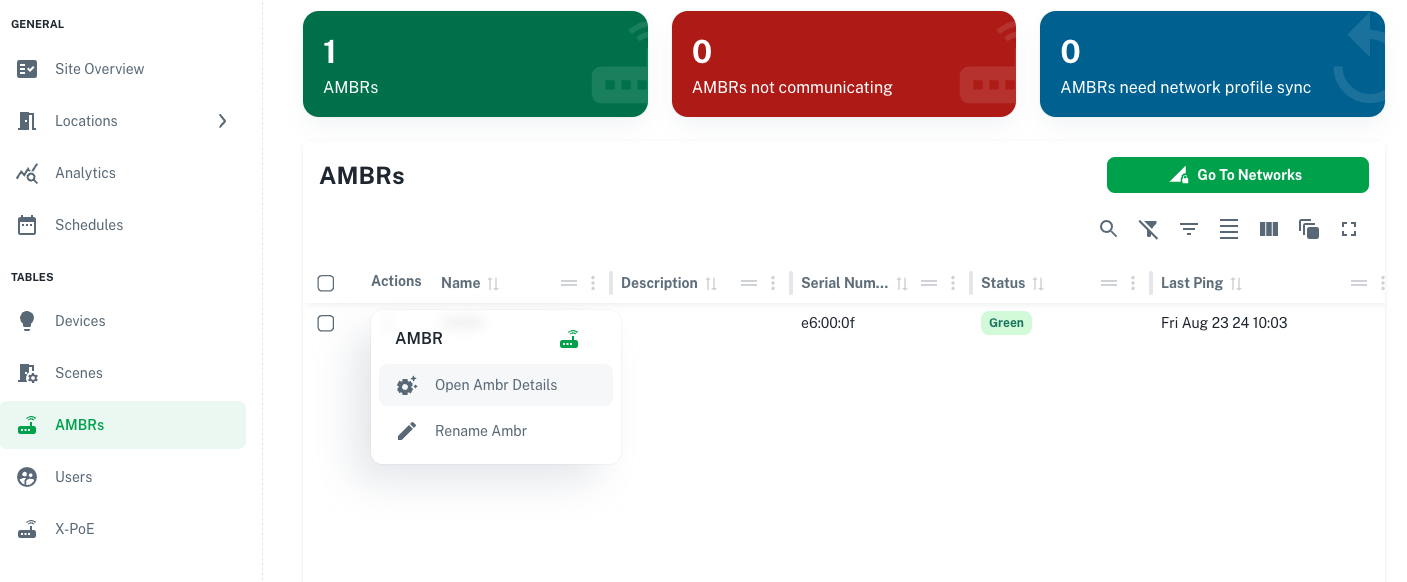
In the config app, perform the following steps to turn on BACnet data tracking:
-
Navigate to the "AMBRs" table, select the three dots next to the AMBR, and select "Open AMBR Details".
-
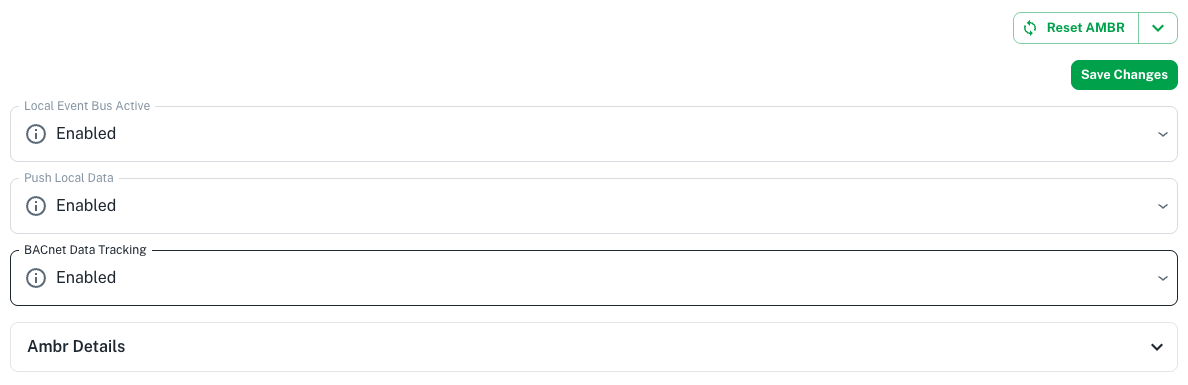
Ensure "BACnet Data Tracking" is set to "Enabled" and select "Save Changes".
Note
BACnet data tracking must be enabled on all AMBRs that should report BACnet data.
-
-
Login to the AMBR at https://[ip.address]. Example url:
https://192.168.42.39/ (replace with your AMBR's ip address).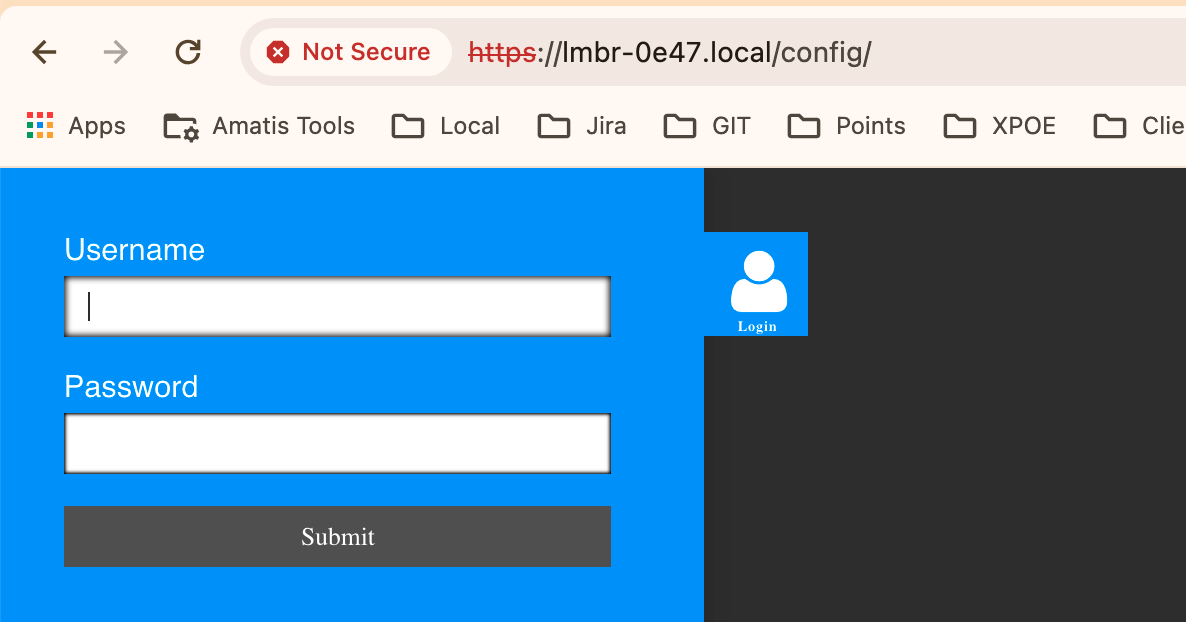
Note
It is normal to have to manually accept the cert. Contact Amatis if you have not updated your credentials and need the default username and password.
-
Navigate to the BACnet configuration page https://[ip.address]/BACnet.php. Example url:
https://192.168.42.39/BACnet.php (replace with your AMBR's ip address).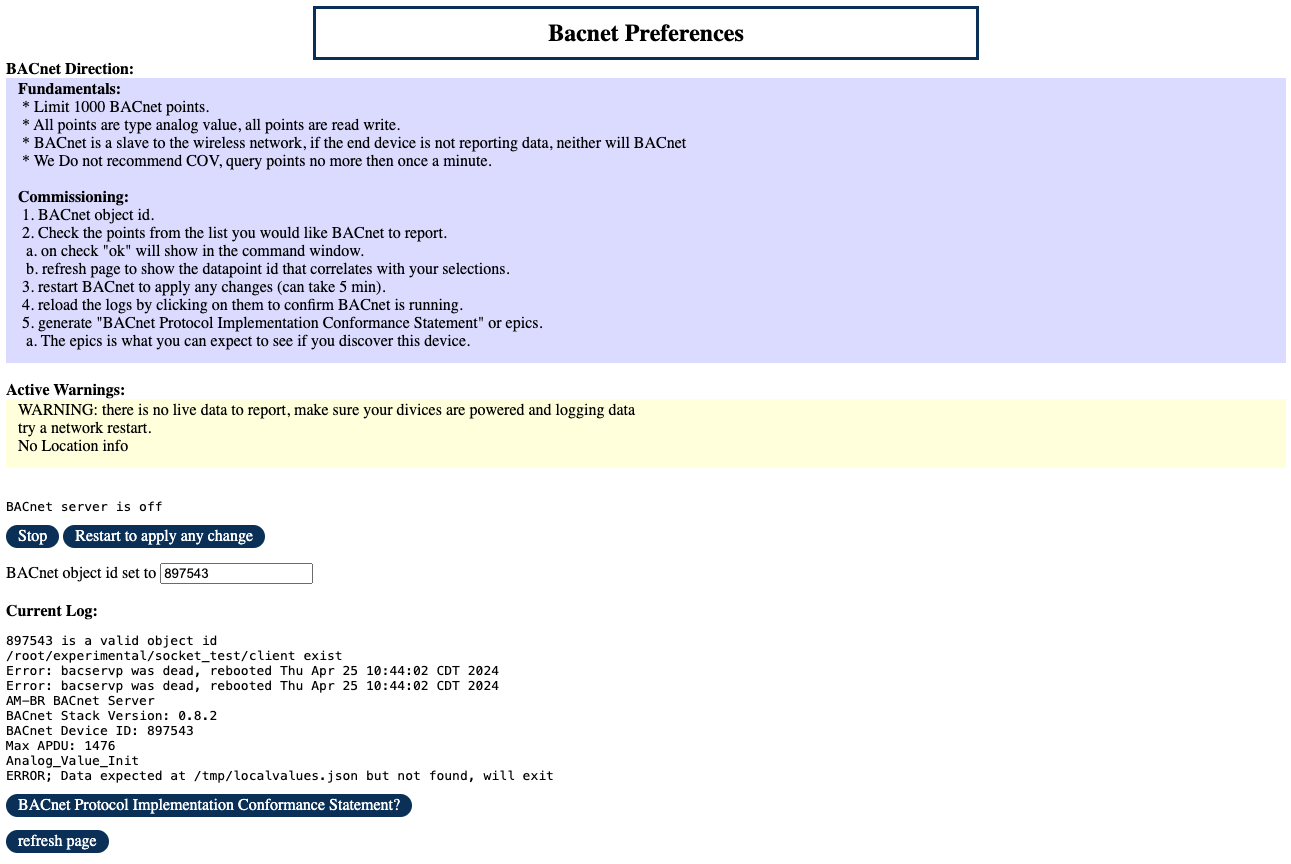
-
Input the BACnet server ID for this AMBR.
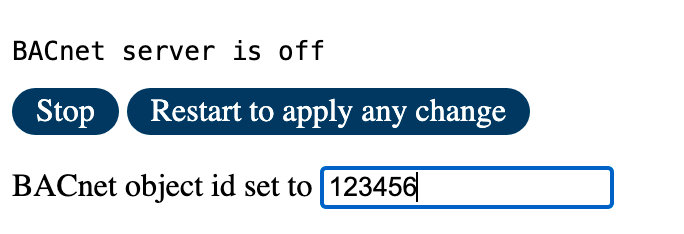
Note
The server IDs in these images are examples. The correct BACnet server ID will be needed.
-
Select any data point from the list.

Note
Ask Amatis to enable BACnet for this AMBR if you don't see any data points to select.
-
Restart the BACnet server using the "Restart to apply any change" button.
- Use a third part BACnet client to discover your new BACnet points.
Filter Data Point Lists, Export BACnet Reports#
A large project may have tens of thousands of data points. We have developed some tools to help organize data points for easy selection. Before you start it's important to have a good plan for what data you want to report to BACnet.
Import Location Data#
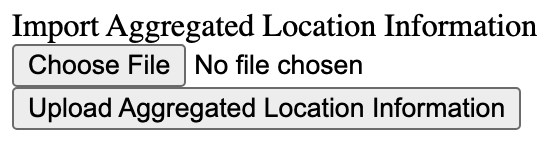
It is highly recommended to import location data. This adds valuable information to the datapoints such as the location they are programmed into.
-
Contact Amatis to obtain an export of the location data for the site. You will need the AMBR ID found on the sticker, or the siteID from the login page.
- Example site ID from the login page:

- Example site ID from the login page:
-
Upload the location data using the form at the bottom of the BACnet home page.
Sort And Select Data Points#
Once location data has been imported, the data points will be able to be sorted by device name, location, etc...
- Sort you data point list by selecting the headers in the data points table. It is recommended to sort by "data dictionary name" to organize the table by data type.
- For example, if you want to see the occupancy data points:
- Find the "occ" data dictionary point in the sorted list. All "occ" data points will now be grouped together.
- Select the data points you want to report.
- For example, if you want to see the occupancy data points:
Export BACnet Data Points#
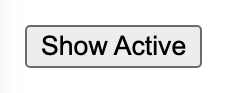
Once you are happy with your selection, it is time to export the BACnet data points with the BACnet integrator.
-
Click the "Show Active" button.
-
Use the export buttons to export your BACnet inventory with your preferred data type.

Note
When exporting data from multiple AMBRs, copy the table with the "Copy" button, and paste the information into a single spreadsheet. This will keep all the BACnet inventory for the site under one spreadsheet.
-
Share your BACnet inventory with your BACnet integrator.
BACnet trouble shooting.#
Most BACnet issues fall into two catagories. Trouble finding and organizing points, or the point used to work, but is no longer reporting. Here we can find some tips to solve these common hurtles.
Finding And Organizing Points#
If you are having trouble finding and organizing BACnet data points, use the "BACnet Protocol Implementation Conformance Statement" (EPics) button, to query your server for all the points it is reporting.

Data No Longer Reporting#
When BACnet data stops reporting, this is typically a BACnet issue. Confirm the following things before submitting a support ticket:
If all the points under the AMBR not reporting:
- Power cycle the AMBR
- If the AMBR was replaced, BACnet will need to be configured again. Amatis can help recover your points using the BACnet inventory export from the previous steps.
If just a few points stopped reporting:
- Confirm the device that stopped reporting is active (green status in the config app). If the device has turned red, the device can be power cycled. If the device is still not logging, please report to Amatis.
- If the device was replaced, you will need to log into AMBR and reselect the points this device was logging. If you have trouble with this reach out to Amatis for support.